Using the Excel Time Function
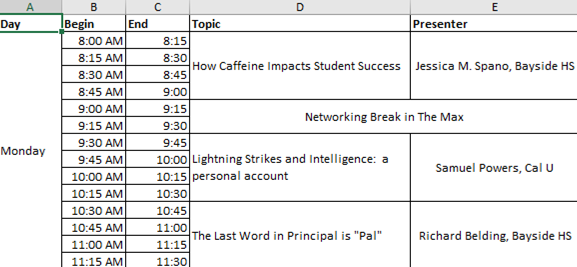
I have been working on planning a conference for an organization and need to create a daily agenda. In the past, this task would be achieved by using some combination of cutting, pasting, and filling within Excel. Recently, I discovered a way to create a time-delineated agenda using the TIME function in Excel. After creating the agenda, you can use the Camera command in Excel to display highlights that are responsive to your changes.
Let us assume that we are planning a conference and need to develop an agenda for presentations. We know that each presentation will last an hour, but we also want to accommodate break times. Therefore, we decide we want to create an agenda that is divided into 15-minute increments.
We begin by opening a blank Excel workbook and creating a general layout.
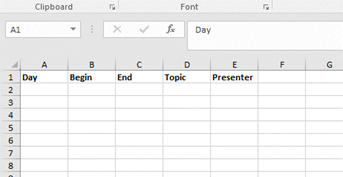
We need to format the “Begin” and “End” columns to display time in an AM/PM format. To do this, we highlight both columns and select “Format Cells”, then “Time”, and “1:30 PM”.
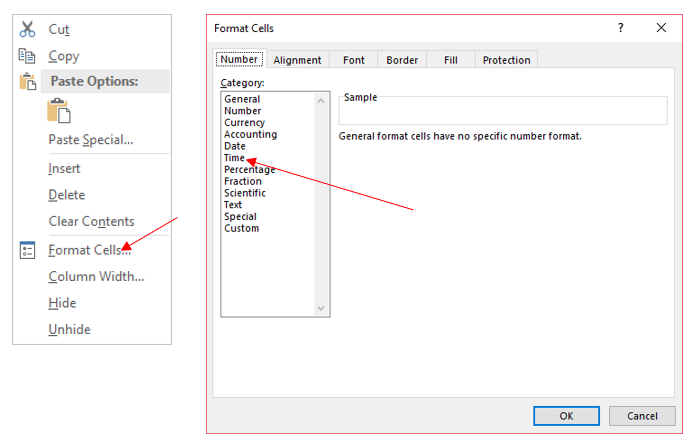
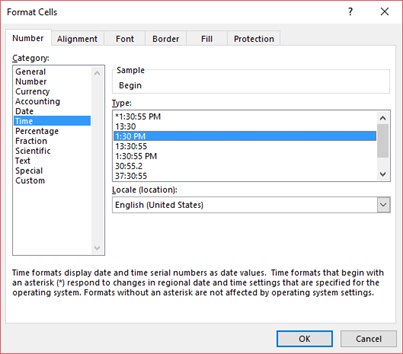
With the “Start” and “End” time columns correctly formatted, we can begin to populate the agenda by adding our first 15-minute increments.

Let us start with the “Start” times and determine of selection of cells to populate. We want to begin the selection in the cell directly beneath the first start time. Our selection should look like the following:
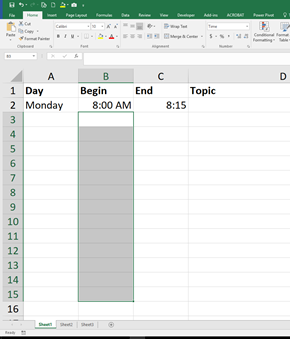
With the selection highlighted, we are now ready to incorporate the TIME function. The TIME function allows you to select the number of hours, minutes, and seconds to be added to your base time. The function looks like this in your worksheet.

For our example, you enter the following formula in the box to create our beginning time in 15-minute increments:

After we have entered the formula, we hit “CTRL” + “Enter” to fill our formula down the column. The outcome will look like this:
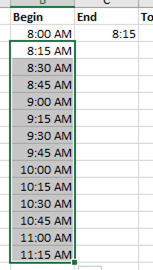
Now, we do the same for the “End” time column by adjusting the formula to the appropriate reference:

After entering the formula, when we hit “CTRL” + “Enter” and we should have the following outcome:
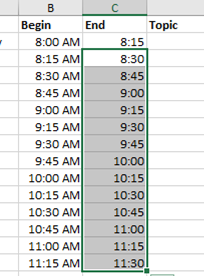
With the beginning and end times created, we can now finish by adding relevant data to our agenda.
